
The Wine Making Process, Step by Step
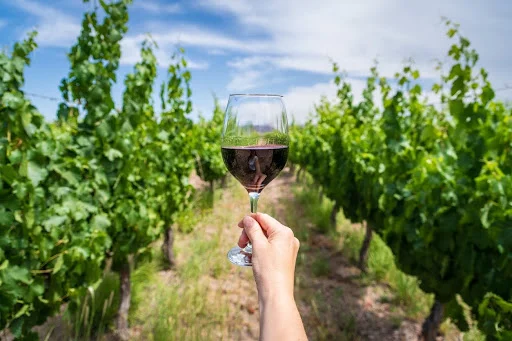
The winemaking process consists of six core stages: harvest, crushing and pressing, fermentation, clarification, aging, and bottling. Each stage affects what ends up in your glass. At Southwest Wine Center at Yavapai College, our students work through every one of these steps in a working teaching winery on our estate vineyard in Clarkdale, Arizona.
Most people taste wine without knowing how much went into the bottle. The process of making wine spans months, sometimes years, and every decision along the way shapes the final result.
This article breaks down the wine-making process step by step, using real examples from our estate vineyard and teaching winery in the Verde Valley. Whether you are curious about wine, considering studying viticulture and enology, or just want to understand what you are tasting in our tasting room, this guide clearly covers each stage.
Stage 1 — Harvest: The First and Most Time-Sensitive Decision
The wine-making process starts in the vineyard, not the winery. Harvest timing determines the sugar level, acidity, and flavor profile of the grapes before any decisions are made in the winery.
Our students track grape maturity throughout the growing season using a refractometer to measure Brix, the percentage of sugar in the juice. They also assess pH and titratable acidity, taste through clusters from different vine rows, and evaluate seed and skin ripeness by hand.
How We Decide When to Pick
At our Verde Valley estate vineyard, harvest typically runs from late August through October, depending on the variety. The elevation at roughly 3,500 feet slows ripening compared to lower-altitude growing regions, which builds more natural acidity in the fruit.
Our students pick early in the morning when temperatures are cooler. This protects the aromatic compounds in the grapes before they reach the crusher. A few degrees of temperature difference at harvest can show up clearly in the finished wine.
Stage 2 — Crushing and Pressing: Separating Juice from Skins
After harvest, the grapes go through sorting and then the crusher-destemmer. This is where the wine-making process splits into two paths, depending on the wine style.
For red wines, the juice stays in contact with the skins after crushing. Color, tannin, and many flavor compounds come from the skins, not the pulp. The longer the skin contact, the deeper the color and the more structure the wine develops.
For white wines, the skins are separated from the juice quickly. The juice is pressed off the solids and clarified before fermentation begins.
What Pressing Pressure Actually Does
Students at our teaching winery taste press fractions at different pressure levels side by side. Light pressing yields clean, gentle juice. Heavier pressing extracts harsher compounds from the seeds and skin tissue. The difference is clear in the glass, which is why pressing decisions are part of our enology coursework in the lab.
Stage 3 — Fermentation: Where Sugar Becomes Alcohol
Fermentation is the core of the wine-making process. Yeast consumes the natural sugars in grape juice and converts them into alcohol and carbon dioxide. This stage can take anywhere from a few days to several weeks, depending on temperature, yeast strain, and the winemaker’s goals.
| Wine Style | Fermentation Temperature | Why |
| Red wine | 75–85°F (24–29°C) | Extracts more color and tannin from skins |
| White wine | 55–65°F (13–18°C) | Preserves fresh fruit aromatics |
| Sparkling | 50–60°F (10–15°C) | Retains CO2 for natural carbonation |
Our students monitor fermentation daily, tracking sugar levels and temperature until the wine runs dry, meaning most of the available sugar has been consumed.
Wild Yeast vs. Selected Strains
Winemakers choose between wild fermentations using native yeast populations already present on grape skins, or inoculated fermentations using a selected yeast strain. Wild fermentations can add complexity but carry more unpredictability. Selected strains give the winemaker more control over timing and flavor outcomes.
Stage 4 — Clarification: Removing What Does Not Belong
After fermentation, the wine contains solids, including grape skins, seeds, dead yeast cells, and proteins. Clarification removes these before bottling through fining and filtration.
Racking is the first action taken in the winery to remove the wine off from the sediment at the bottom of a tank or barrel. Racking is commonly done once to three times in a wine’s life.
Fining adds a substance to the wine that binds to unwanted particles, pulling them out of suspension. Common fining agents include bentonite clay, egg whites, and isinglass. Each interacts differently with the wine’s chemistry.
Filtration passes the wine through a membrane that catches remaining solids. The filter’s pore size determines how much is removed. Finer filtration strips more from the wine, including some texture and body, so winemakers calibrate this based on the wine’s profile and intended shelf life.
Students in our enology program run fining trials with bench samples before treating a full tank. Tasting through the results helps them understand what each agent removes and what it costs in texture.
Stage 5 — Aging and Maturation: Time as an Ingredient
The wine-making process does not stop after fermentation. Aging is where a wine develops complexity, integrates its components, and either sheds rough edges or gains depth.
Stainless steel tanks keep wine fresh, bright, and fruit-forward. No additional flavors are added. This approach works well for aromatic whites, light reds, and wines meant to be consumed within one to two years.
Oak barrels add flavor compounds, including vanilla, baking spice, and toasty notes. They also allow a slow, controlled exposure to oxygen over months or years, which softens tannins and builds texture.
Our teaching winery uses both approaches. Comparing the same grape variety aged in oak and in steel is a standard exercise in our enology coursework because it makes the oak contribution audible, or rather, tasteable, in a very direct way.
How Long Does Wine Need to Age?
There is no single answer. Light, dry whites may be ready three to six months after harvest. A structured red aged in oak may spend 12 to 24 months in a barrel before it is ready to bottle. A wine built for cellaring may continue developing in the bottle for 10 years or more.
The student-crafted wines from our teaching winery include both styles. Some are released within months. Others spend time in our oak barrel program before they reach the tasting room.
Stage 6 — Bottling: The Final Stage Before the Consumer
Bottling brings the wine-making process to its practical endpoint. Before filling, the wine may go through a final filtration pass and cold stabilization to prevent tartrate crystals from forming in the bottle after purchase.
Tartrates are harmless. They occur naturally when tartaric acid, a compound found in all wine, precipitates out of solution at cold temperatures. But they alarm people who have not seen them before, so cold stabilization reduces the chance of that happening on the consumer side.
Closure choice also matters here. Natural cork allows slow oxygen exchange over time, which benefits wines built to age. Screwcaps and synthetic corks offer a more airtight seal, better for wines meant to be opened within two years.
Our students handle bottling runs as part of their winery operations training, including line setup, fill level calibration, and label application. Everything they do in the winery has a downstream effect on the product.
What This Means If You Are Thinking About Studying Wine
Understanding the wine-making process at a conceptual level is a starting point. Applying it in a working winery is where the real learning happens.
At the Southwest Wine Center at Yavapai College, students do not just study winemaking in a classroom. They monitor the vines through the growing season, make harvest calls, run fermentations, pull barrel samples, and build blends. The teaching winery operates at industry scale, with real equipment and real wine going into real bottles.
If you want to move from curiosity to hands-on industry experience, our Viticulture and Enology program is built for that.
Frequently Asked Questions
1. How long does the wine-making process take from harvest to bottle?
The wine-making process takes a minimum of three to four months for a simple, early-release white wine. Red wines aged in oak typically take 12 to 24 months from harvest to bottle. Wines built for cellaring may take longer to be considered ready for release.
2. What is the difference between fermentation and aging in winemaking?
Fermentation converts sugar to alcohol using yeast and is the process that technically turns grape juice into wine. Aging is what happens after fermentation, when the wine rests in a vessel such as a barrel or tank, developing complexity and integrating its components over time.
3. Why does red wine go through skin contact but white wine does not?
The color, tannin, and many of the flavor compounds in red wine come from the grape skins, not the pulp. Red wine ferments with the skins present to extract these compounds. White wine is pressed off the skins before or shortly after crushing to produce a lighter, cleaner juice.
4. What is Brix, and why does it matter at harvest?
Brix is a measurement of the sugar concentration in grape juice, expressed as a percentage. Winemakers use Brix readings at harvest to gauge grape ripeness and predict the final alcohol level of the finished wine. Higher Brix means more sugar available for yeast to convert into alcohol.
5. Can I see the wine-making process in person?
At Southwest Wine Center at Yavapai College, our tasting room in Clarkdale, Arizona, is open Thursday through Sunday, 12 to 6 PM. Our guided tasting flights are poured by students and graduates who worked through every stage described in this article. They can walk you through what you are tasting and explain the decisions behind it.